In the event that we began with a HTML ( + CSS) site, we don’t need to discard it all when moving to WordPress. You can change over your HTML into WordPress and run your (now more capable) site on the element WordPress stage.
Then again might be that is not the situation. Maybe you are simply considering how to change over a customer’s HTML plan into a completely fledged WordPress topic. Then again perhaps you might want to learn essential WordPress (+ PHP) programming from the more-recognizable HTML side.
How To Create A WordPress Theme from HTML Part 01
Whatever the reason you are here today, this WordPress instructional exercise will acquaint you with the fundamentals of making a WordPress topic from HTML. You can take after this manual for make your subject sans preparation or you can make a beeline for Github and download the WPExplorer starter topic which gives an “unfilled canvas” to make your topic with all the fundamental format documents and code to begin. So in the event that you are one of those individuals that somewhat learn by perusing through code then download the starter subject, avoid the guide and perceive how things function… Otherwise, get a code editorial manager (I utilize and prescribe Notepad++, or SublimeText) and a program prepared, then take after this straightforward manual for the end.
Naming the WordPress Theme
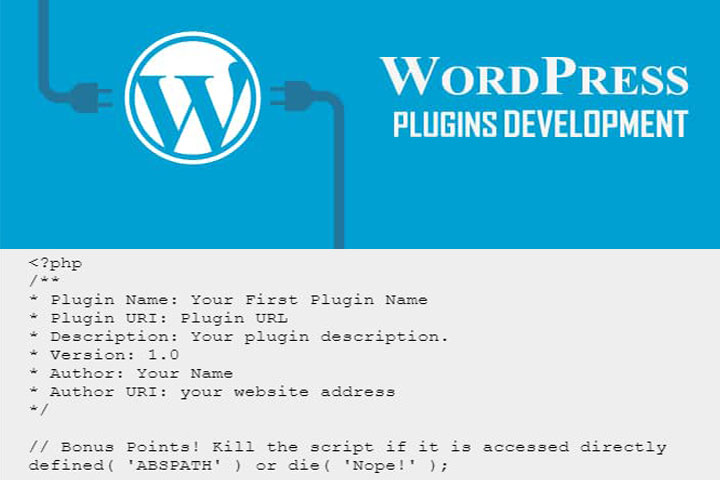
To start with, we need to give your topic a novel name, which isn’t important in case you’re building a subject for your site as it were. In any case, we have to name your topic to make it effortlessly identifiable upon establishment.
General assumptions at this point:
- You need to ready your own index.html and CSS stylesheet.
- You have a working WordPress establishment with no less than one topic e.g. Twenty Fourteen
- You have as of now made a subject organizer where you’ll be sparing your new WordPress topic
We should return to naming your WordPress subject. Open your code manager and duplicate glue the substance of your template into another record and spare it as style.css in your topic organizer. Include the accompanying data at the exceptionally top of the recently made style.css:
/*
Theme Name: Your theme's name
Theme URI: Your theme's URL
Description: A brief description of your theme
Version: 1.0 or any other version you want
Author: Your name or WordPress.org's username
Author URI: Your web address
Tags: Tags to locate your theme in the WordPress theme repository
*/
Do not leave out the (/…/) comment tags. First you need to save the changes. This info says WordPress the name of your creating theme. The most important part is the it’s name, which helps you to choose and activate your theme .
Breaking Up Your HTML Template into PHP Files
This instructional exercise additionally accept you have your HTML format organized left to right: header, content, sidebar, footer. On the off chance that you have an alternate outline, you may need to play with the code a bit. It’s fun and super simple.
The following stride includes making four PHP records. Utilizing your code editorial manager, make index.php, header.php, sidebar.php and footer.php, and spare them in your subject envelope. Every one of the documents are vacant now, so don’t anticipate that them will do anything. For outline purposes, I am utilizing the accompanying index.html and CSS template documents:
INDEX.HTML
<!DOCTYPE html>
    <head>
        <meta charset="UTF-8">
        <title>How To Convert HTML Template to WordPress Theme - WPExplorer</title>
        <link rel="stylesheet" type="text/css" media="all" href="style.css"/>
    </head>
    <body>
        <div id="wrap">
            <header class="header">
                <p>This is header section. Put your logo and other details here.</p>
            </header><!-- .header -->
            <div class="content">
                <p>This is the main content area.</p>
            </div><!-- .content -->
            <div class="sidebar">
                <p>This is the side bar</p>
            </div><!-- .sidebar -->
            <footer class="footer">
                <p>And this is the footer.</p>
            </footer><!-- .footer -->
        </div><!-- #wrap -->
    </body>
</html>
CSS STYLESHEET
#wrap{margin: 0 auto; width:95%; margin-top:-10px; height:100%;}
.header{width:99.8%; border:1px solid #999;height:135px;}
.content{width:70%; border:1px solid #999;margin-top:5px;}
.sidebar{float:right; margin-top:-54px;width:29%; border:1px solid #999;}
.footer{width:99.8%;border:1px solid #999;margin-top:10px;}
You can get both codes in the event that you don’t have anything to work with. Simply duplicate glue them into your code manager, spare them, make the four PHP records we just specified and prepare for the following part. Open your recently made (and exhaust) header.php. Login into your current WordPress establishment, explore to Appearance –>> Editor and open header.php. Duplicate all the code amongst thetags and glue it into your header.php document. The accompanying is the code I got from the header.php document in Twenty Fourteen subject:
<head>
    <meta charset="<?php bloginfo( 'charset' ); ?>">
    <meta name="viewport" content="width=device-width">
    <title><?php wp_title( '|', true, 'right' ); ?></title>
    <link rel="profile" href="http://gmpg.org/xfn/11">
    <link rel="pingback" href="<?php bloginfo( 'pingback_url' ); ?>">
    <!--[if lt IE 9]>
    <script src="<?php echo get_template_directory_uri(); ?>/js/html5.js"></script>
    <![endif]-->
    <?php wp_head(); ?>
</head>
Then open your index.html file and copy the header code to your header.php just below thetags as shown below:
<html>
    <head>
        <meta charset="<?php bloginfo( 'charset' ); ?>">
        <meta name="viewport" content="width=device-width">
        <title><?php wp_title( '|', true, 'right' ); ?></title>
        <link rel="profile" href="http://gmpg.org/xfn/11">
        <link rel="pingback" href="<?php bloginfo( 'pingback_url' ); ?>">
        <link rel="stylesheet" href="<?php bloginfo('stylesheet_url'); ?>" type="text/css" />
        <!--[if lt IE 9]>
        <script src="<?php echo get_template_directory_uri(); ?>/js/html5.js"></script>
        <![endif]-->
        <?php wp_head(); ?>
    </head>
    <body>
        <header class="header">
        <p>This is header section. Put your logo and other details here.</p>
    </header>
Then
<link rel="stylesheet" href="<?php bloginfo('stylesheet_url'); ?>" type="text/css" />anywhere between thetags in the header.php file to link your stylesheet. Remember also to put theandopening tags in the header.php as shown above. Save all changes.
Copy the second section (i.e.
from index.html to the newly-created index.php , and add…
<?php get_header(); ?>…at the very top and …
<?php get_sidebar(); ?>
<?php get_footer(); ?>
to indisputably the base. These three lines get the header.php, sidebar.php and footer.php (in a specific order) and show them in the index.php, which assembles your code back. Spare all progressions. Now, your index.php record ought to resemble:
<?php get_header(); ?>
<?php get_sidebar(); ?>
<?php get_footer(); ?>
At that point duplicate the substance from the sidebar and footer segments in your index.html to sidebar.php and footer.php individually.
Your HTML layout is going to transform into a WordPress subject. We simply need to include your posts. On the off chance that you have posts on your blog, how might you show them in your specially crafted “HTML-to-WordPress” subject? You utilize an uncommon kind of PHP capacity known as the Loop. The Loop is only a specific bit of code that shows your posts and remarks wherever you put it.
Presently, to show your posts in the substance segment of the index.php layout, duplicate and glue the accompanying code amongst the and labels as demonstrated as follows:
<div class="content">
    <?php if ( have_posts() ) : ?>
        <?php while ( have_posts() ) : the_post(); ?>
            <div id="post-<?php the_ID(); ?>" <?php post_class(); ?>>
                <div class="post-header">
                    <div class="date"><?php the_time( 'M j y' ); ?></div>
                    <h2><a href="<?php the_permalink(); ?>" rel="bookmark" title="Permanent Link to <?php the_title_attribute(); ?>"><?php the_title(); ?></a></h2>
                    <div class="author"><?php the_author(); ?></div>
                </div><!--.post-header-->
                <div class="entry clear">
                    <?php if ( function_exists( 'add_theme_support' ) ) the_post_thumbnail(); ?>
                    <?php the_content(); ?>
                    <?php edit_post_link(); ?>
                    <?php wp_link_pages(); ?>
                </div><!--. entry-->
                <footer class="post-footer">
                    <div class="comments"><?php comments_popup_link( 'Leave a Comment', '1 Comment', '% Comments' ); ?></div>
                </footer><!--.post-footer-->
            </div><!-- .post-->
        <?php endwhile; /* rewind or continue if all posts have been fetched */ ?>
            <nav class="navigation index">
                <div class="alignleft"><?php next_posts_link( 'Older Entries' ); ?></div>
                <div class="alignright"><?php previous_posts_link( 'Newer Entries' ); ?></div>
            </nav><!--.navigation-->
        <?php else : ?>
    <?php endif; ?>
</div><!--.content-->
That will deal with your posts. Simple as ABC. At this point (and utilizing the specimen documents gave as a part of this instructional exercise), your header.php ought to resemble this:
<head>
    <meta charset="<?php bloginfo( 'charset' ); ?>">
    <meta name="viewport" content="width=device-width">
    <title><?php wp_title( '|', true, 'right' ); ?></title>
    <link rel="profile" href="http://gmpg.org/xfn/11">
    <link rel="pingback" href="<?php bloginfo( 'pingback_url' ); ?>">
    <!--[if lt IE 9]>
    <script src="<?php echo get_template_directory_uri(); ?>/js/html5.js"></script>
    <![endif]-->
    <?php wp_head(); ?>
</head>
Your sidebar.php should look like this:
<?php dynamic_sidebar( 'sidebar' ); ?>Your footer.php should look like this:
<footer class="footer">
    <p>And this is the footer</p>
</footer>
<?php wp_footer(); // Crucial core hook! ?>
</body>
</html>
Did you see the end and labels in the footer? Bear in mind to incorporate those as well.
Your style.css ought to look something like this:
/*
Theme Name: Creating WordPress Theme from HTML
Theme URI: http://wpexplorer.com
Description: This theme shows you how to create WordPress themes from HTML
Version: 1.0
Author: Freddy for @WPExplorer
Author URI: http://WPExplorer.com/create-wordpress-theme-html-1/
Tags: wpexplorer, custom theme, HTML to WordPress, create WordPress theme
*/
body {
    font-family: arial, helvetica, verdana;
    font-size: 0.8em;
    width: 100%;
    height: 100%;
}

.header {
    background-color: #1be;
    margin-left: 14%;
    top: 0;
    border-width: 0.1em;
    border-color: #999;
    border-style: solid;
    width: 72%;
    height: 250px;
}

.content {
    background-color: #999;
    margin-left: 14%;
    margin-top: 5px;
    float: left;
    width: 46%;
    border-width: 0.1em;
    border-color: #999;
    border-style: solid;
}

.sidebar {
    background-color: #1d5;
    margin-right: 14%;
    margin-top: 5px;
    float: right;
    border-width: 0.1em;
    border-color: #999;
    border-style: solid;
    top: 180px;
    width: 23%;
}

.footer {
    background-color: red;
    margin-left: 14%;
    float: left;
    margin-top: 5px;
    width: 72%;
    height: 50px;
    border-width: 0.1em;
    border-color: #999;
    border-style: solid;
}
And your index.php should look similar to:
<?php get_header(); ?>
<div class="content">
    <?php if ( have_posts() ) : ?>
        <?php while ( have_posts() ) : the_post(); ?>
            <div id="post-<?php the_ID(); ?>" <?php post_class(); ?>>
                <div class="post-header">
                    <div class="date"><?php the_time( 'M j y' ); ?></div>
                    <h2><a href="<?php the_permalink(); ?>" rel="bookmark" title="Permanent Link to <?php the_title_attribute(); ?>"><?php the_title(); ?></a></h2>
                    <div class="author"><?php the_author(); ?></div>
                </div><!--.post-header-->
                <div class="entry clear">
                    <?php if ( function_exists( 'add_theme_support' ) ) the_post_thumbnail(); ?>
                    <?php the_content(); ?>
                    <?php edit_post_link(); ?>
                    <?php wp_link_pages(); ?>
                </div><!--. entry-->
                <footer class="post-footer">
                    <div class="comments"><?php comments_popup_link( 'Leave a Comment', '1 Comment', '% Comments' ); ?></div>
                </footer><!--.post-footer-->
            </div><!-- .post-->
        <?php endwhile; /* rewind or continue if all posts have been fetched */ ?>
            <nav class="navigation index">
                <div class="alignleft"><?php next_posts_link( 'Older Entries' ); ?></div>
                <div class="alignright"><?php previous_posts_link( 'Newer Entries' ); ?></div>
            </nav><!--.navigation-->
        <?php else : ?>
    <?php endif; ?>
</div><!--.content-->
<?php get_sidebar(); ?>
<?php wp_footer(); // Crucial footer hook! ?>
<?php get_footer(); ?>
Again – this depends on a left to right site with a header, content, sidebar, footer format. Is it true that you are taking after? All the five documents ought to be spared in your subject envelope. Name the envelope whatever you need and pack it into a ZIP document utilizing WinRar or a comparable program. Transfer your new subject to your WordPress establishment, actuate it and see your changed over topic in real life!
That was simple, correct? You can style your topic anyway you need yet a large portion of the components we adore in WordPress are still latent since… this instructional exercise covers the essentials of changing over HTML layouts into WordPress and ought to be of extraordinary esteem to you as a novice. In the following instructional exercise, we will take things a step higher and play around with different parts of WordPress programming, (for example, Template Files and Template Tags) that will give you a chance to turn your HTML formats whichever way you like. Stay tuned!